Master Jumpseller Automations and Enhance Customer Engagement
Dive into the Email Automations feature. Learn how to set triggers, craft flows, and send timely emails to boost customer relations. Your guide to ...

This automation sequence aims to recover website visitors who have abandoned their carts. You can use similar steps to create win-back campaigns and send automated welcome emails.
Click on ‘Automation’ on the left panel and tap the ‘Create new workflow’ button on the top right.
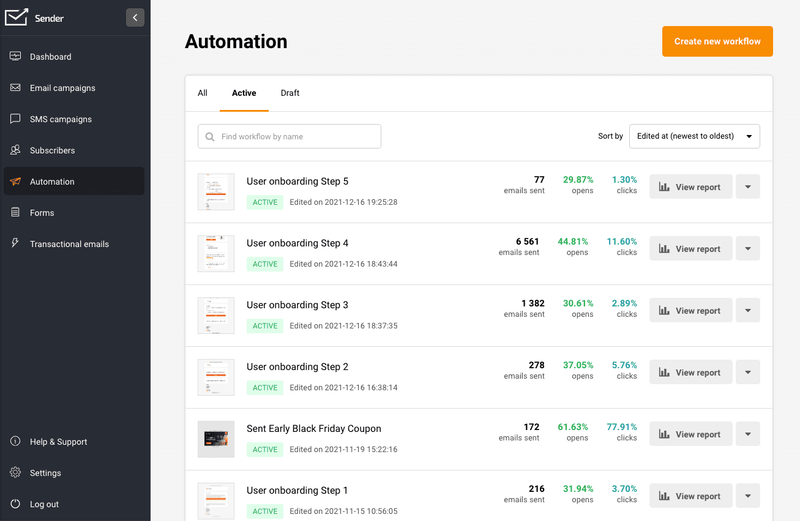
Give your workflow a name and click on Create.
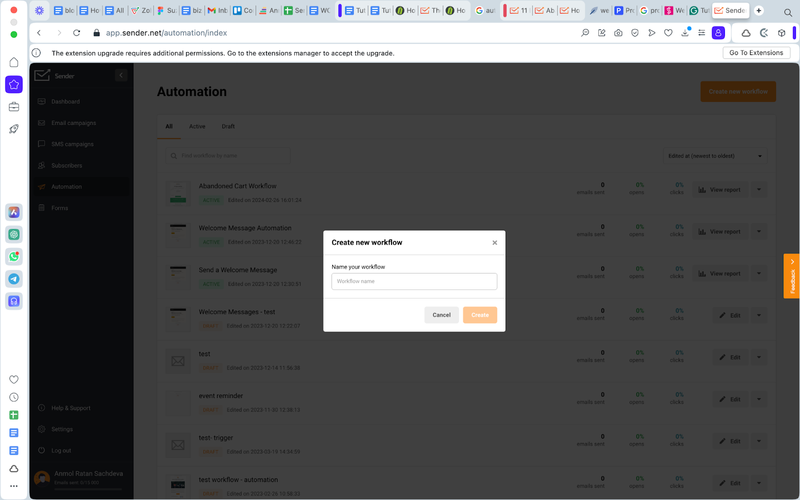
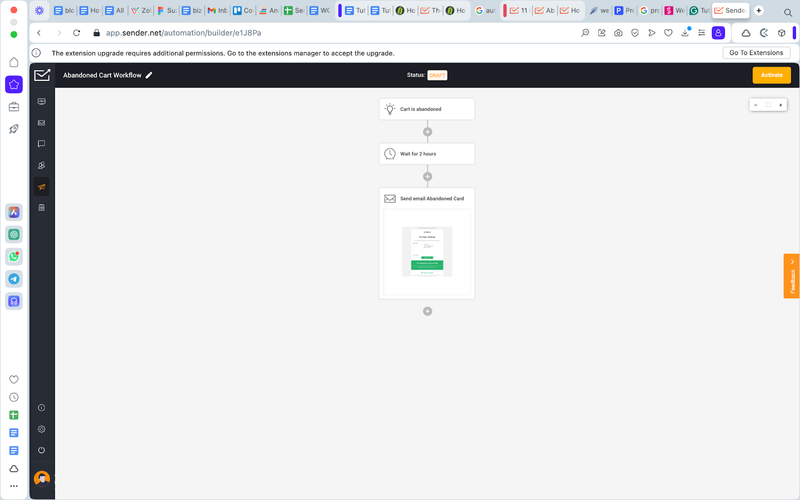
Pick the desired trigger, ‘A Cart is Abandoned,’ to trigger an email automatically whenever someone abandons a cart.
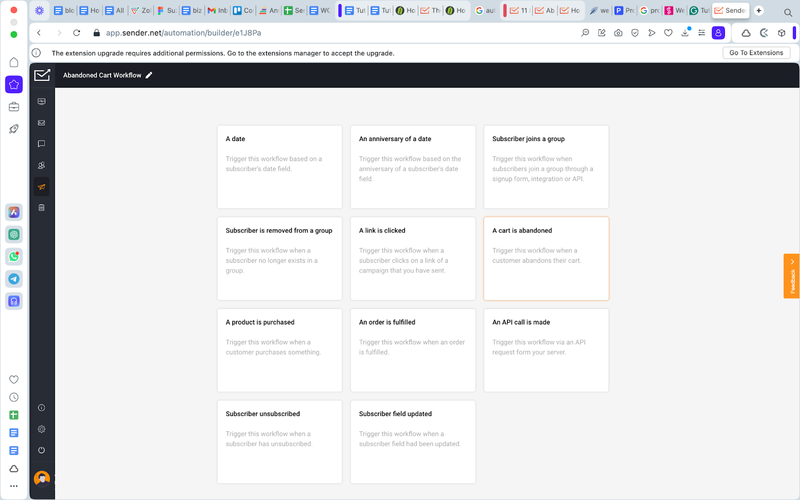
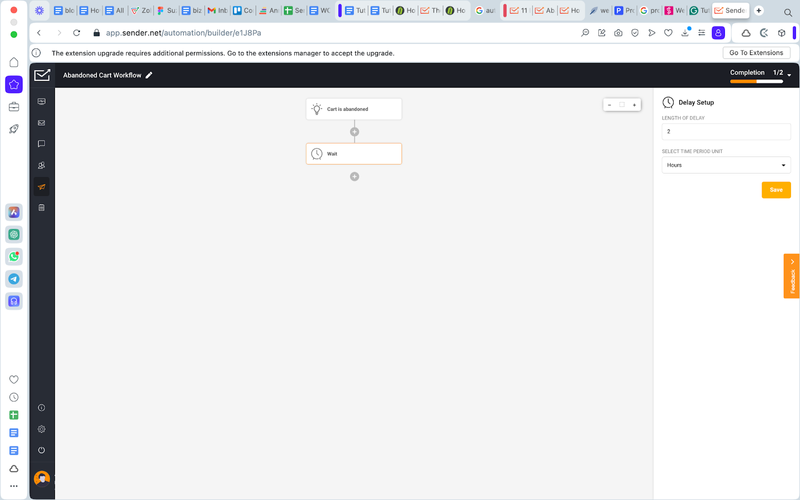
Add a delay step, as shown in the screenshot.
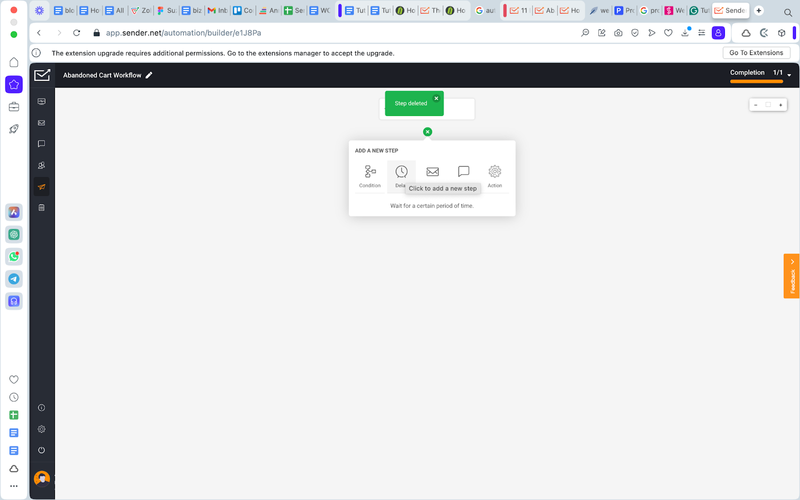
Add the desired delay time on the right panel and click on Save. You should add a delay of at least 2 hours before following up on an abandoned cart.
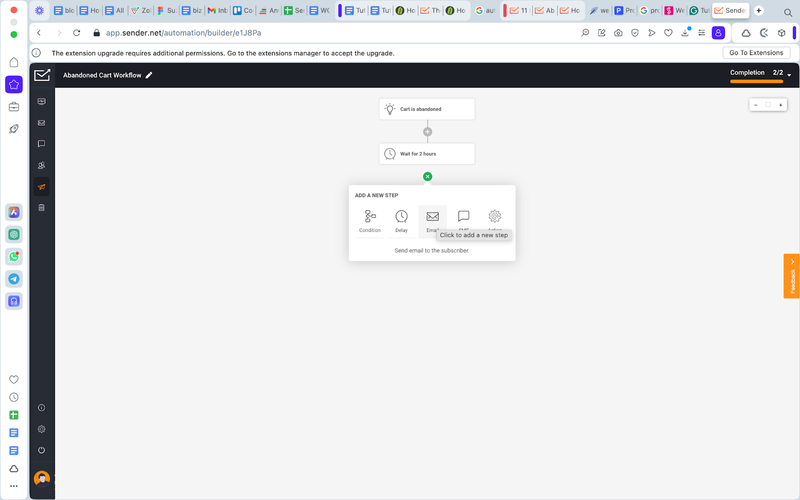
Now click the ‘+’ sign and select ‘Email’ to set up an abandoned cart email.
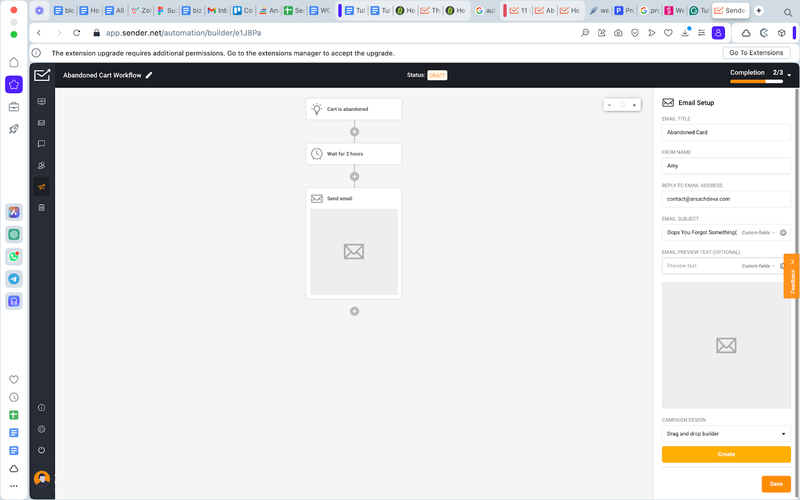
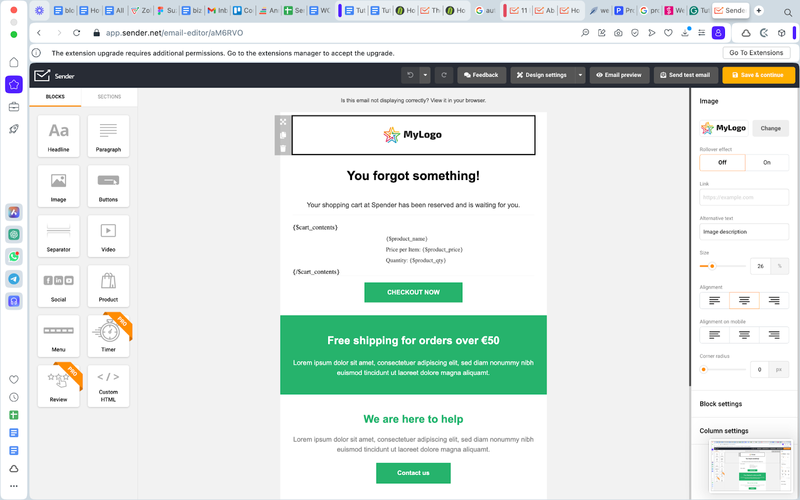
Start configuring your email by adding a title, name, subject line, preview text, etc., on the right panel.
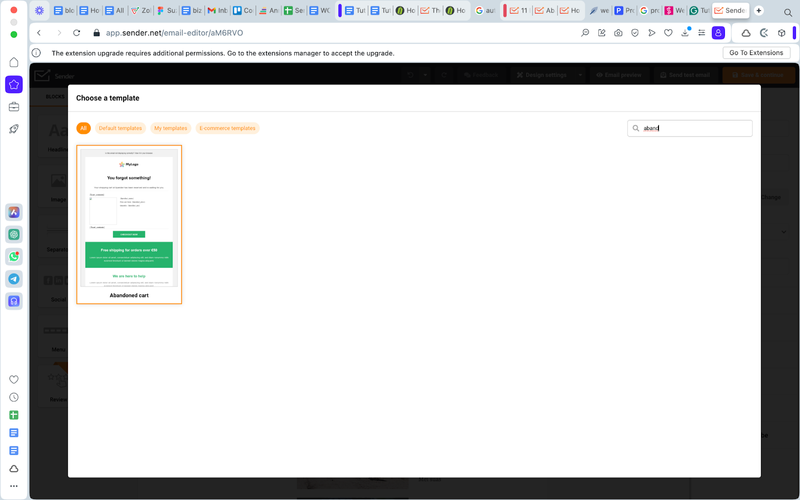
Pick an abandoned cart template from the template library or create an email from scratch.
Once you’ve personalized the elements of your email and added the content, click Save & Continue.
Now, activate the abandoned cart automation flow from the button on the top right.
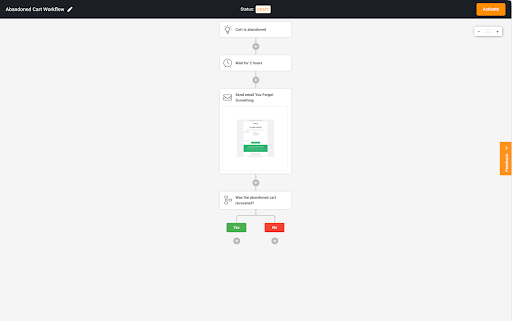
You can also add a condition to check if the cart abandoner purchased the item after your email, as shown below. If they bought, you can add them to a separate group or re-nurture them with another follow-up email if they don’t act.
Congratulations! You have successfully set up an automated email campaign for abandoned carts in your store.
You can add steps like sending an SMS to your abandoned cart flow for extra engagement and higher chances of recovery. Similarly, you can set any automation by picking the desired trigger in step number 3.
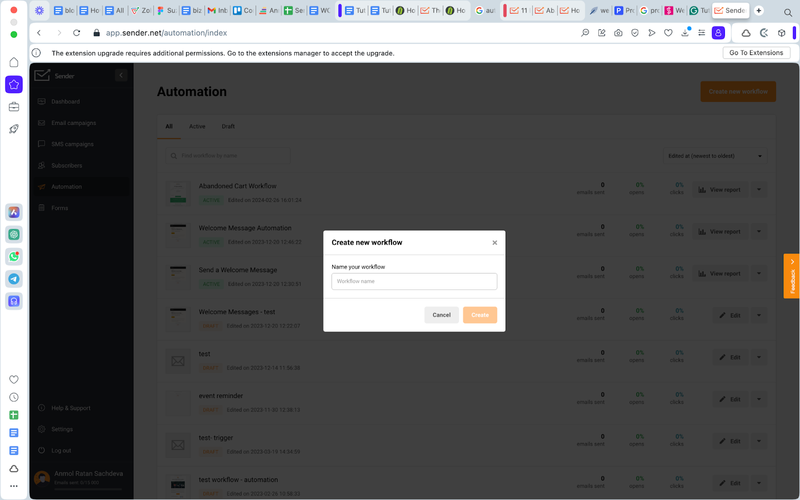
Click on ‘Automation’ on the left panel and tap the ‘Create new workflow’ button on the top right.
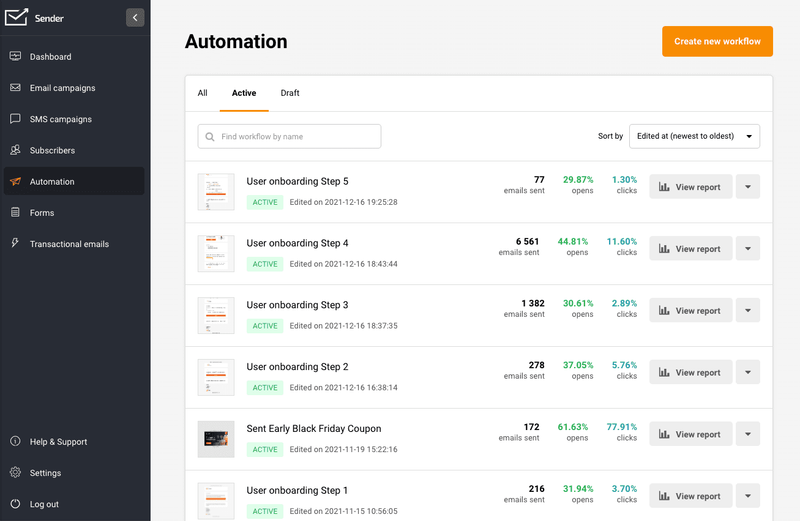
Name your workflow as – Welcome Email.
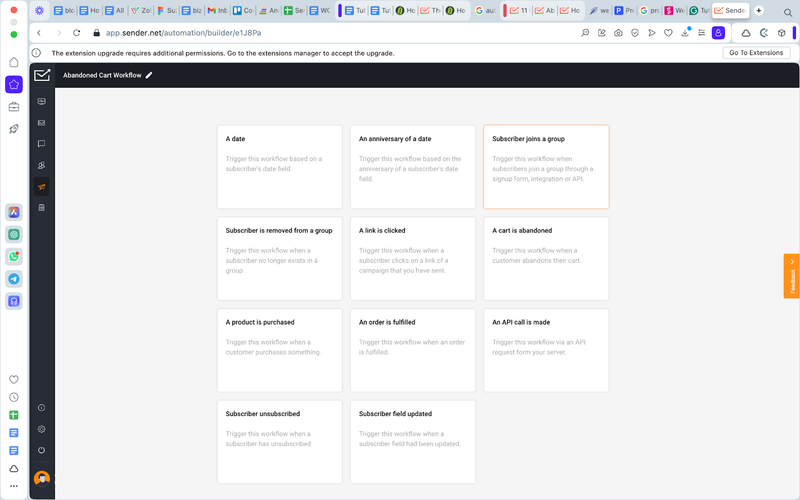
Pick the desired trigger, ‘Subscriber added to a group’, to trigger an email whenever someone new is added to your list.
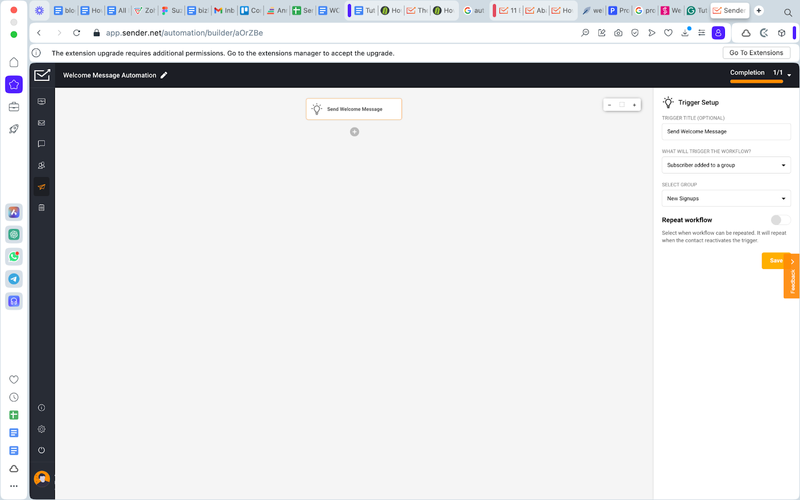
Give your trigger a relevant name, select a group, New Signups, from the left panel, and click the Save button.
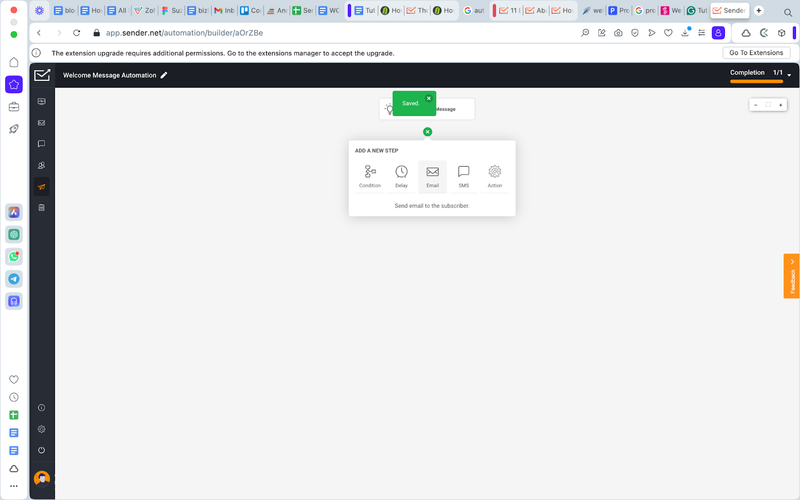
Now click the ‘+’ sign and select ‘Email’ to set up a welcome email.
Set up your welcome email on the left panel by adding a title, name, subject line, preview text, etc.
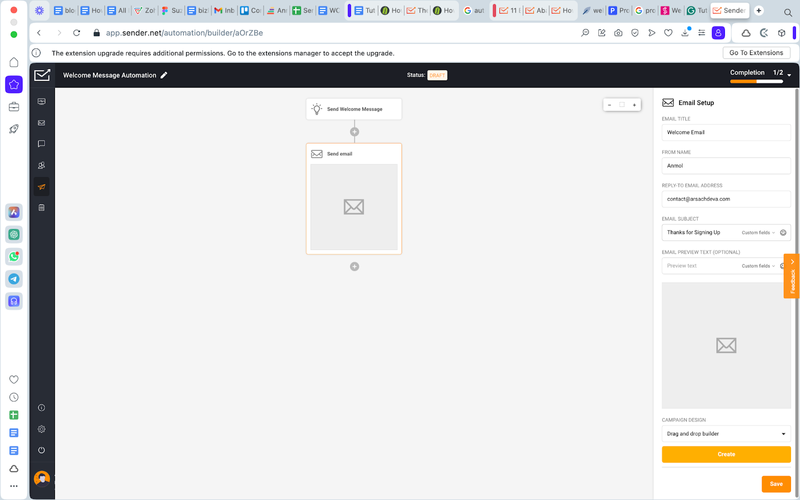
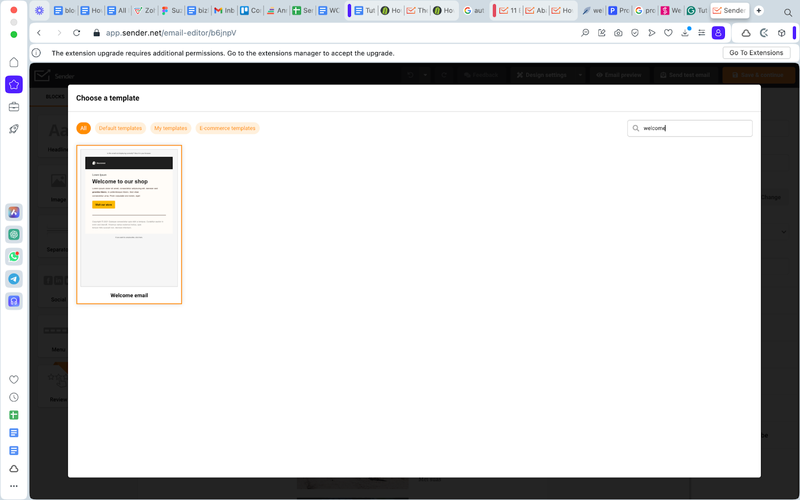
Pick a welcome email template from the template library or create an email from scratch.
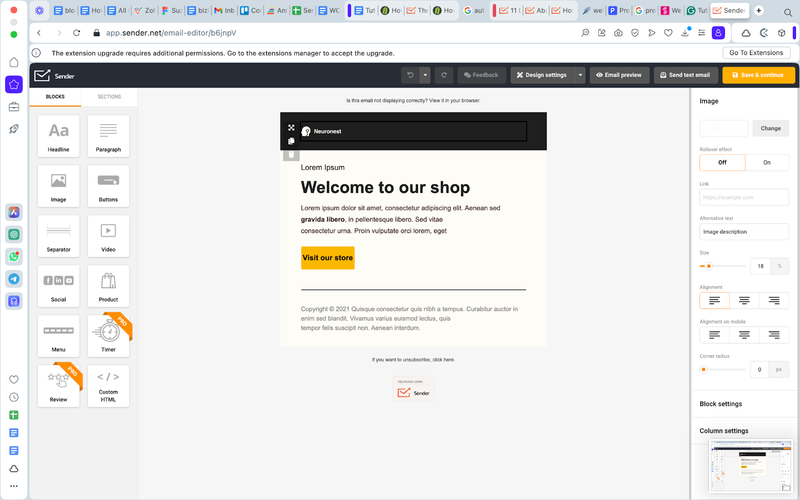
Once you’ve personalized the elements of your email and added your content, click Save & Continue in the top right corner of the screen.
Now, activate the welcome email automation flow from the button on the top right of the screen.
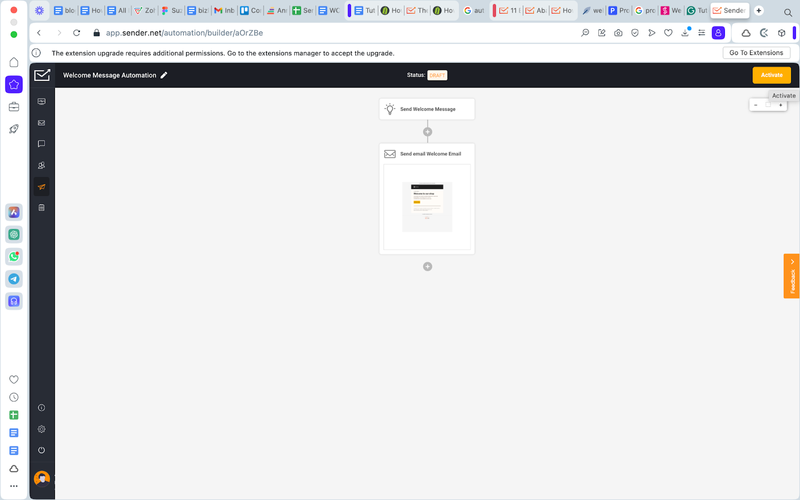
Congratulations! You’ve set up automated welcome emails for your subscribers.
You can also add intelligent automation to engage subscribers further, such as a follow-up email after your first welcome email. To do so, add a delay of 1 day after the first email and create another email in the automation flow.
Free trial for 14 days. No credit card required.