Using the Google Places API - Jumpseller
Create a Javascript code that autocomplete and hides fields on the checkout of your store. Make the checkout process better!
On this guide you will learn all of the available settings to customize the checkout process (Settings > Checkout) and checkout form (Settings > Checkout Form) in your Admin Panel.

| Step | Description | URL Structure |
|---|---|---|
| Information | Contact Information and Shipping Address | /v2/information/success/unique_token |
| Shipping | Shipping Method or Pickup Point Selection | /v2/shipping/success/unique_token |
| Payment | Payment Method Selection and Billing Address | /v2/checkout/payment/unique_token & /v2/billing/success/unique_token |
| Processing | Payment Gateway Process the transaction | External URL |
| Success | Payment Confirmation or Instructions in case of Manual Payments | /v2/checkout/success/unique_token |
Starting by customizing the checkout process (Settings > Checkout), here you can define behaviours for multiple features inside the checkout.
What happens when a customer clicks on Add to cart. Choose between:
If toggled, customers who don’t meet the requirements will not be able to initiate Checkout.

Item count will consider all units of products added to the cart.
Shipping estimations are always displayed in the Checkout process, some stores find value in showing these prices before the initiation of the checkout.
A calculator will be placed in the cart if the toggle is on.

Cross-selling is one of the most effective methods of marketing. Offer related or complementary products to your customers.
Select products that the customer will view as recommended in the cart page.
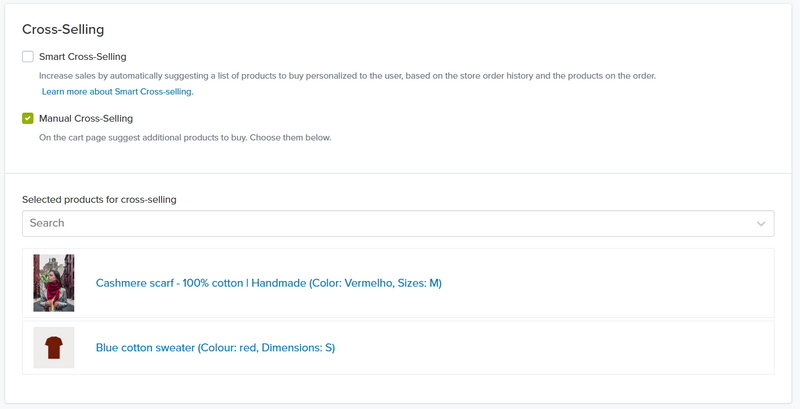
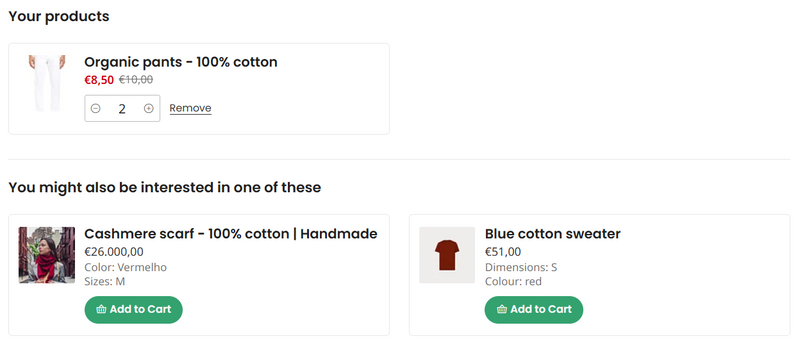
Automate your Cross Selling process in your cart and emails based on purchasing patterns across sessions from repeat sales in our Advanced Plan.
When a customer completes the Information, Shipping, Billing but not the Payment Step, his cart will be considered Abandoned after the time defined in “Expiration time for carts”.

If the customer reached the Processing step, an order will be created in Pending status, the order will be considered abandoned if the customer does not complete the payment, if the payment is rejected, the order will be considered canceled, not abandoned.
Create a schedule for your store’s working hours. Out of those hours your store’s checkout will be closed.

Define for how long your digital product’s urls remain available after purchase and how many download attemps can be made. This helps prevent piracy, as the links become disabled after expiration.

Data Retention policies are critical to ensuring local privacy regulations are being met. Customer Data will be removed from your store after the selected period of time.

The Privacy Policy legal page may include a reference to this setting.
Moving on to the customization of the checkout page (Settings > Checkout Form), here you can define how the checkout fields behave and which information to display.
If you would like to customize its design, such as the checkout main and background colors, as well as the logo and the checkout font, go to General > Branding. Learn more about it on our documentation.
Current version of the Checkout is “Standard”. Previous version “Classic” is a simplistic form that allows some modifications, mostly through Javascript. Classic will not receive updates and will not support Local Pickups.
When toggled, customer will receive a request to give permission to access its location. If accepted, Address Checkout fields will be autocompleted with the current location.
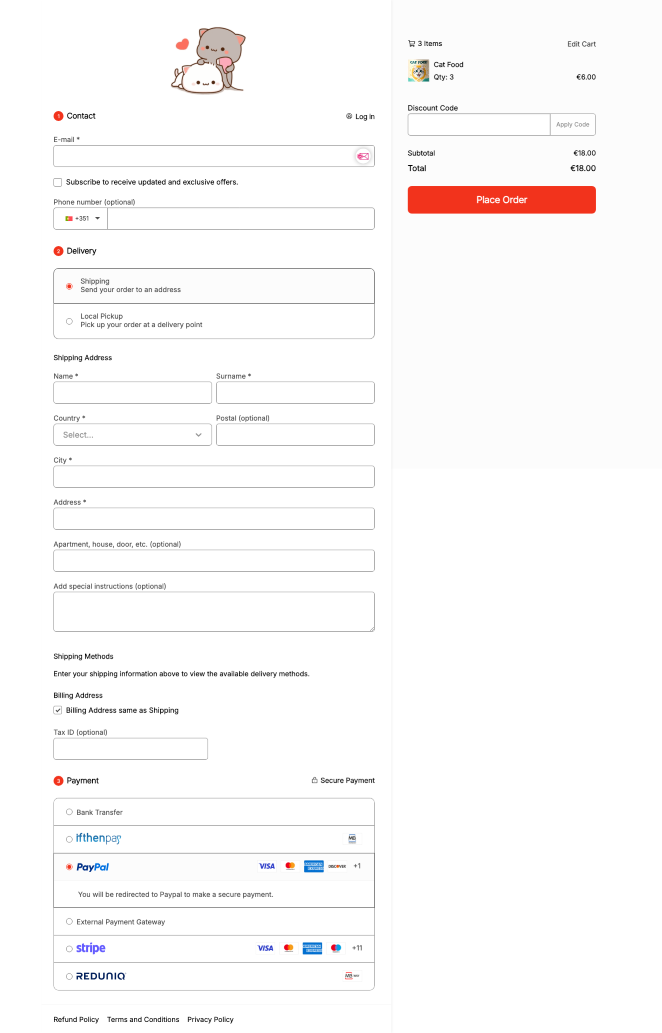
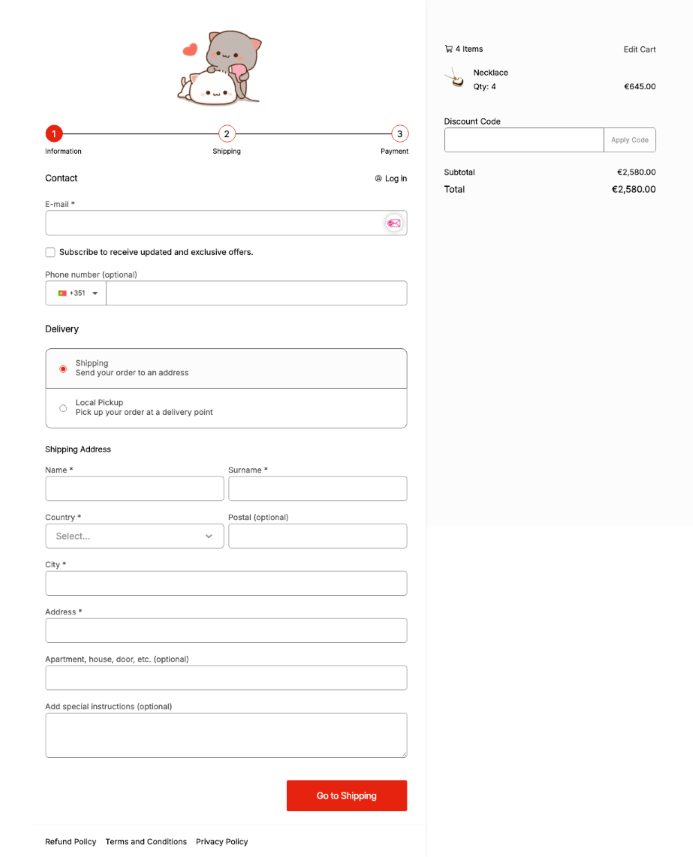
Choose whether your checkout process spans multiple pages or is shown in a single page.

The following images illustrate the design for both the one-page and multi-page checkout experiences.
One-Page Checkout (Option Untoggled)
Multi-Page Checkout (Option Toggled)
If you have any questions regarding this new option please contact us
Even though the customer is picking up the item, you might still need billing information for chargebacks and customer identification. This option is only available in the classic checkout.
Similar to physical store pickups, billing information is crucial even for digital products to issue refunds and may be required in some jurisdictions.
Displays the name of the payment gateway that is providing the listed methods. This can be useful if you change the payment methd name from the default one.

Display the logos of the Payment Networks supported by each payment gateway. This can increase purchase rates, as customers get a confirmation you have the method they are used to paying.

Choose if you want to show a map with the customer address on the success page of the checkout when the selected shipping option is “delivery”
Collect customer feedback post-purchase which you can later on display on your website. Follow the instructions on our documentation to create the required merchant ID. After having it added, you can set an interval after a purchase when they should receive the email asking for their review.

Add extra fields to your checkout form. These can be optional or required, you can click on the checkbox next to a field to change between the two.
Contact
Shipping & Billing
These can be added to any of the three sections: Contact Information, Shipping and Billing Addresses or Other. If a field is added to the Shipping Information, it will be added as well in the billing form. These are the field types:
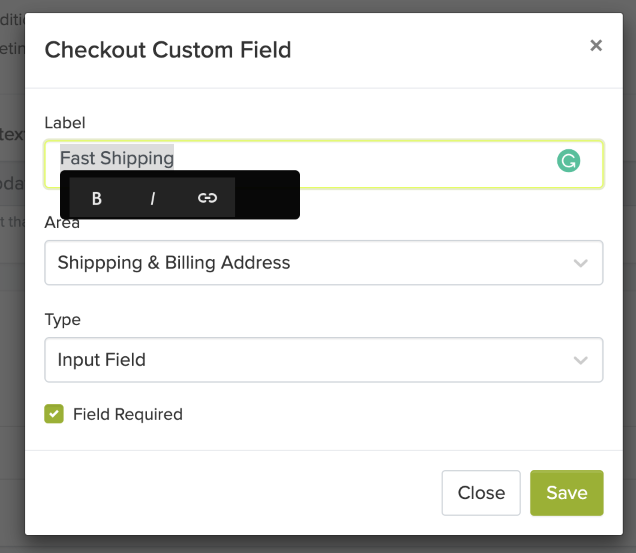
Change the text style to Bold, Italics and add in-text links when creating your customized fields by selecting and hovering text.
At Jumpseller, we prioritize the security of our platform and your online store. For this reason, we apply certain restrictions when it comes to adding custom scripts to the checkout process.
By default, Jumpseller stores use Checkout Version 2, a robust and feature-rich checkout solution. Due to its complexity and the need for security and stability, this version does not allow users to directly modify the HTML of the checkout process to add custom scripts. This includes all steps of the checkout process, with the sole exception of the checkout success page.
The purpose of this restriction is to protect the integrity of your store, the secure transaction process, and ultimately, your sales. Adding unauthorized or untested scripts directly to checkout pages could inadvertently introduce errors or disrupt the smooth functioning of the checkout process. Even a small error in a script can cause the checkout process to fail, which could prevent customers from completing their purchases and significantly impact your sales. Furthermore, unauthorized scripts can pose security risks, potentially exposing sensitive customer information and violating privacy regulations.
For those who desire greater flexibility in code customization, we do offer Checkout Version 1. This version allows for more extensive modifications, including changes to the code. However, it’s important to note that this version is simpler and may not have all the features found in Checkout Version 2.
While adding scripts directly is not possible in Checkout Version 2, you can still use an authorized app, Google Tag Manager (GTM), to insert custom scripts into the checkout success page of your store.
Please follow the steps below:
Set up your Google Tag Manager account: If you don’t already have a Google Tag Manager account, sign up at https://tagmanager.google.com.
Create a new “Container”: Once you have an account, create a new “Container” for your Jumpseller website.
Add the GTM ID to your Jumpseller store: The new container will provide you with a GTM ID. Add this ID to your Jumpseller store’s admin panel by navigating to Admin Panel -> Apps -> Google Tag Manager -> Install the App and Paste your GTM ID in the provided field and save.
Add your script to Google Tag Manager: In your GTM dashboard, go to your container and click on “Tags” -> “New”. Configure your tag by choosing the appropriate type in the “Tag Configuration” section. If you’re adding a custom script, select “Custom HTML” and paste your script in the “HTML” section.
Set your trigger: In the “Triggering” section, set your trigger to run the script on the checkout success page. Choose “Page View” -> “Some Page Views” -> “Page Path” -> “contains” and then type “/checkout/success”.
Save and publish your changes: After setting up your tag and defining its trigger, save your tag. Then, submit the changes to your container to make it go live.
Please be cautious when using this feature. Every script inserted through Google Tag Manager can influence the performance and security of your website. It is crucial that your scripts come from reliable sources and are well-optimized. Also, keep in mind that tracking codes (like Google Analytics or Facebook Pixel) should not be added directly to the checkout pages, as they may interfere with the secure transaction process.
Using these options involves a solid understanding of Javascript. If you are not confident about what this is get an overview of Design for Jumpseller.
The Jumpseller Javascript Library is included in every theme on every store, the most commonly used functions for the checkout process are:
Start your free 7-day trial. No credit card required.