Creating a MailChimp Marketing Campaign to Recover Abandoned Orders
If you are not using Abandoned Order Recovery emails, you are missing out of easy customers. With MailChimp, you can easily create a campaign to se...
Mailchimp is one of the world’s best-known marketing automation platforms and email marketing services.
It has an initial plan (free) that allows you to send 10,000 emails per month with a limit of 2000 emails per day and includes up to 2000 registered customers.
If that limit is reached, you can purchase one of their plans according to your particular needs.
With Jumpseller, some themes already come with a pre-integrated subscription form. To make it work, just follow the guide that is presented below.

Before you start, make sure you have finished the registration steps on Mailchimp.
Connect to your Mailchimp account and in the Dashboard section click on your profile circle at the top right corner > Profile > Extras > Custom Website.


Scroll down and enter the URL of your store, select the audience/list to which you want the contacts to be added and click Get Code.
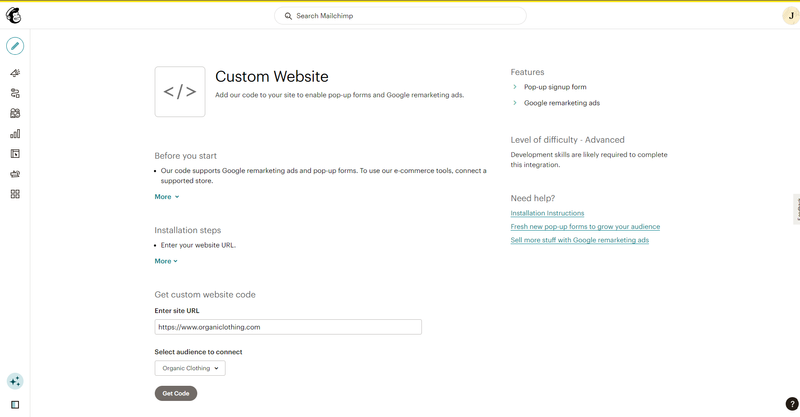
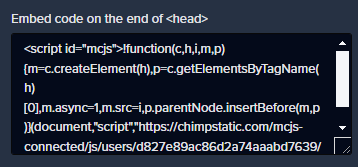
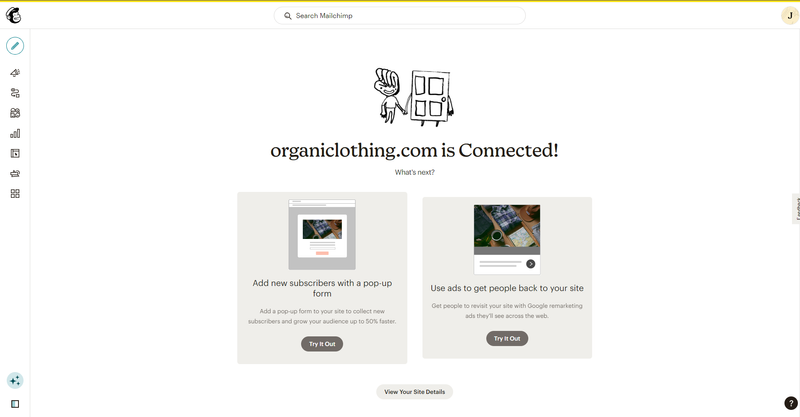
You are now ready to create a pop-up form for your store!
Pop-up registration forms help you connect with people who visit your website.
Use the pop-up form editor to quickly design a pop-up form and customize it with a special offer or discount so you can increase your audience and sales.
To access the pop-up editor, follow these steps:
Once you have your account, go to Create (pencil icon) in the sidebar, select Signup Form > Pop-up form > and the audience to which you want to add the customers who are registering. Click Begin.

After this you can customize the look of your pop-up form as you want.
Finally, remember to enable the form so that it is visible on your store by clicking on edit and then toggling the switch. If everything is well connected, you will see the domain of your store at the top and the connection icon in green.

Important: Please note that Mailchimp stores a cookie for one year to prevent a pop-up from being seen repeatedly after closing or completing it. If you are going to test the pop-up window in your store, you may need to delete the cookies from your browser, use a different browser or open an incognito window of the browser to be able to view it several times, especially if you make changes in it and want to view them directly in your store.
The Mailchimp app works to improve the way you manage your customer lists.
It will allow you to synchronize the contact information of your Jumpseller customers with a Mailchimp list, facilitating your email marketing strategy.
This app can be found in the apps gallery of your store, in the Admin Panel > Apps.
Subscribe to Mailchimp. If you are already subscribed, just login on the platform.
You will need an API key to connect your Mailchimp account to your online store on Jumpseller. To get your API key, click here.
Next, under the Your API keys section, click on Create A Key, name it, click on Generate key and once it is generated, copy it as seen below:
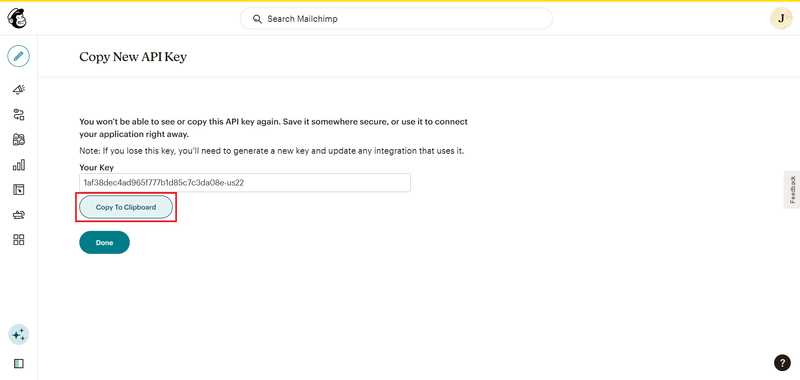
Go to your admin panel in Jumpseller > Apps > Mailchimp and click Install App > Yes, Authorize.
Paste the API key (in this example it’s: 1af38dec4ad965f777b1d85c7c3da08e-us22) to the Mailchimp API key field, as seen in the following image:
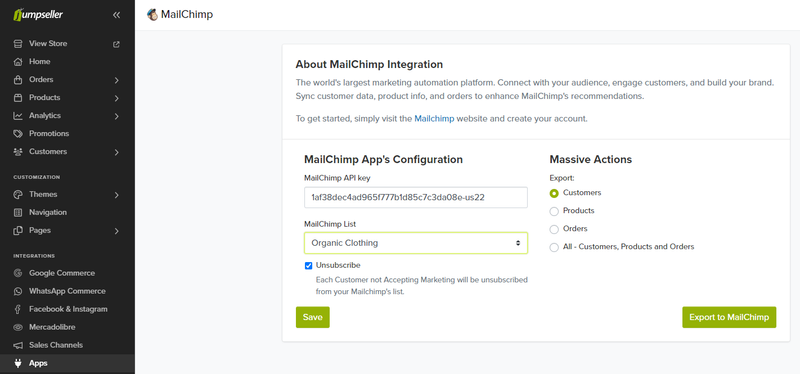
If the API key was verified successfully, you will be able to choose the Mailchimp list that you want your store customers to be part of. However, if the API key is incorrect, it will not allow you to select a list or check the boxes.
Important: If the API key does not work and you are sure it is correct, the problem could be related to an ad blocker or some pop-up blocker in your browser. In that case, please disable it, otherwise it may not work properly.
There is one optional checkbox you can select: Unsubscribe. If this box is checked, all clients who do not accept email marketing will be eliminated from the subscription list.
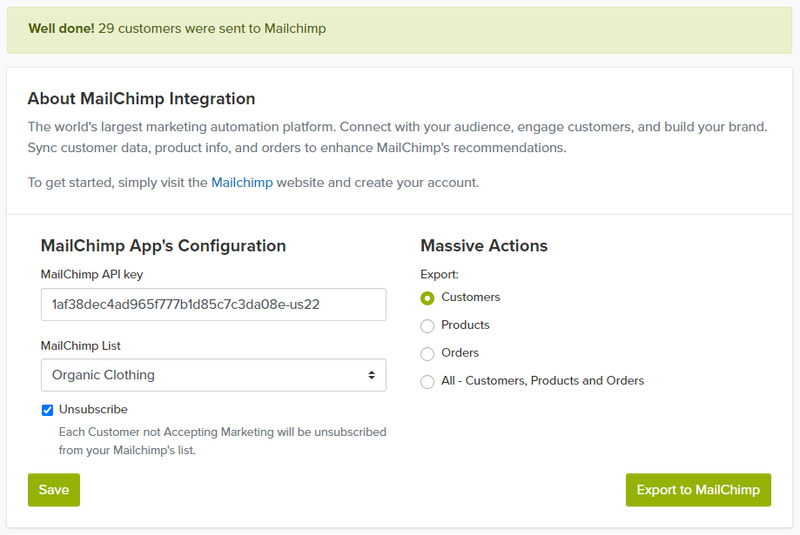
After you click on Import Customers to Mailchimp you should see a success message like this one:
Will the app be available for my plan?
Yes, this app will be available for all our plans, but if you have plans BASIC or PLUS, you won’t be able to see the customers who subscribe and their information/details in your Jumpseller admin panel.
To overcome this limitation you can also subscribe to the PRO or PREMIUM plans.
Does the app export abandoned orders to Mailchimp?
Abandoned orders will be exported to Mailchimp. However, you will only be able to use them for abandonment campaigns, not for other e-commerce tools. Learn more about how to create abandoned cart recovery campaigns.
Is it possible to export clients with labels to classify / categorize contacts?
Although it is possible to export your Jumpseller customer details to a Mailchimp list, it is not possible to export their specific classification or categorization.
How can I clean my contact list?
If you have any questions, please do not hesitate to contact us.
Start your free 7-day trial. No credit card required.